Raspberry Pi 5 Stack
Mmmmmmm... delicious pie... Raspberry Pi, that is!
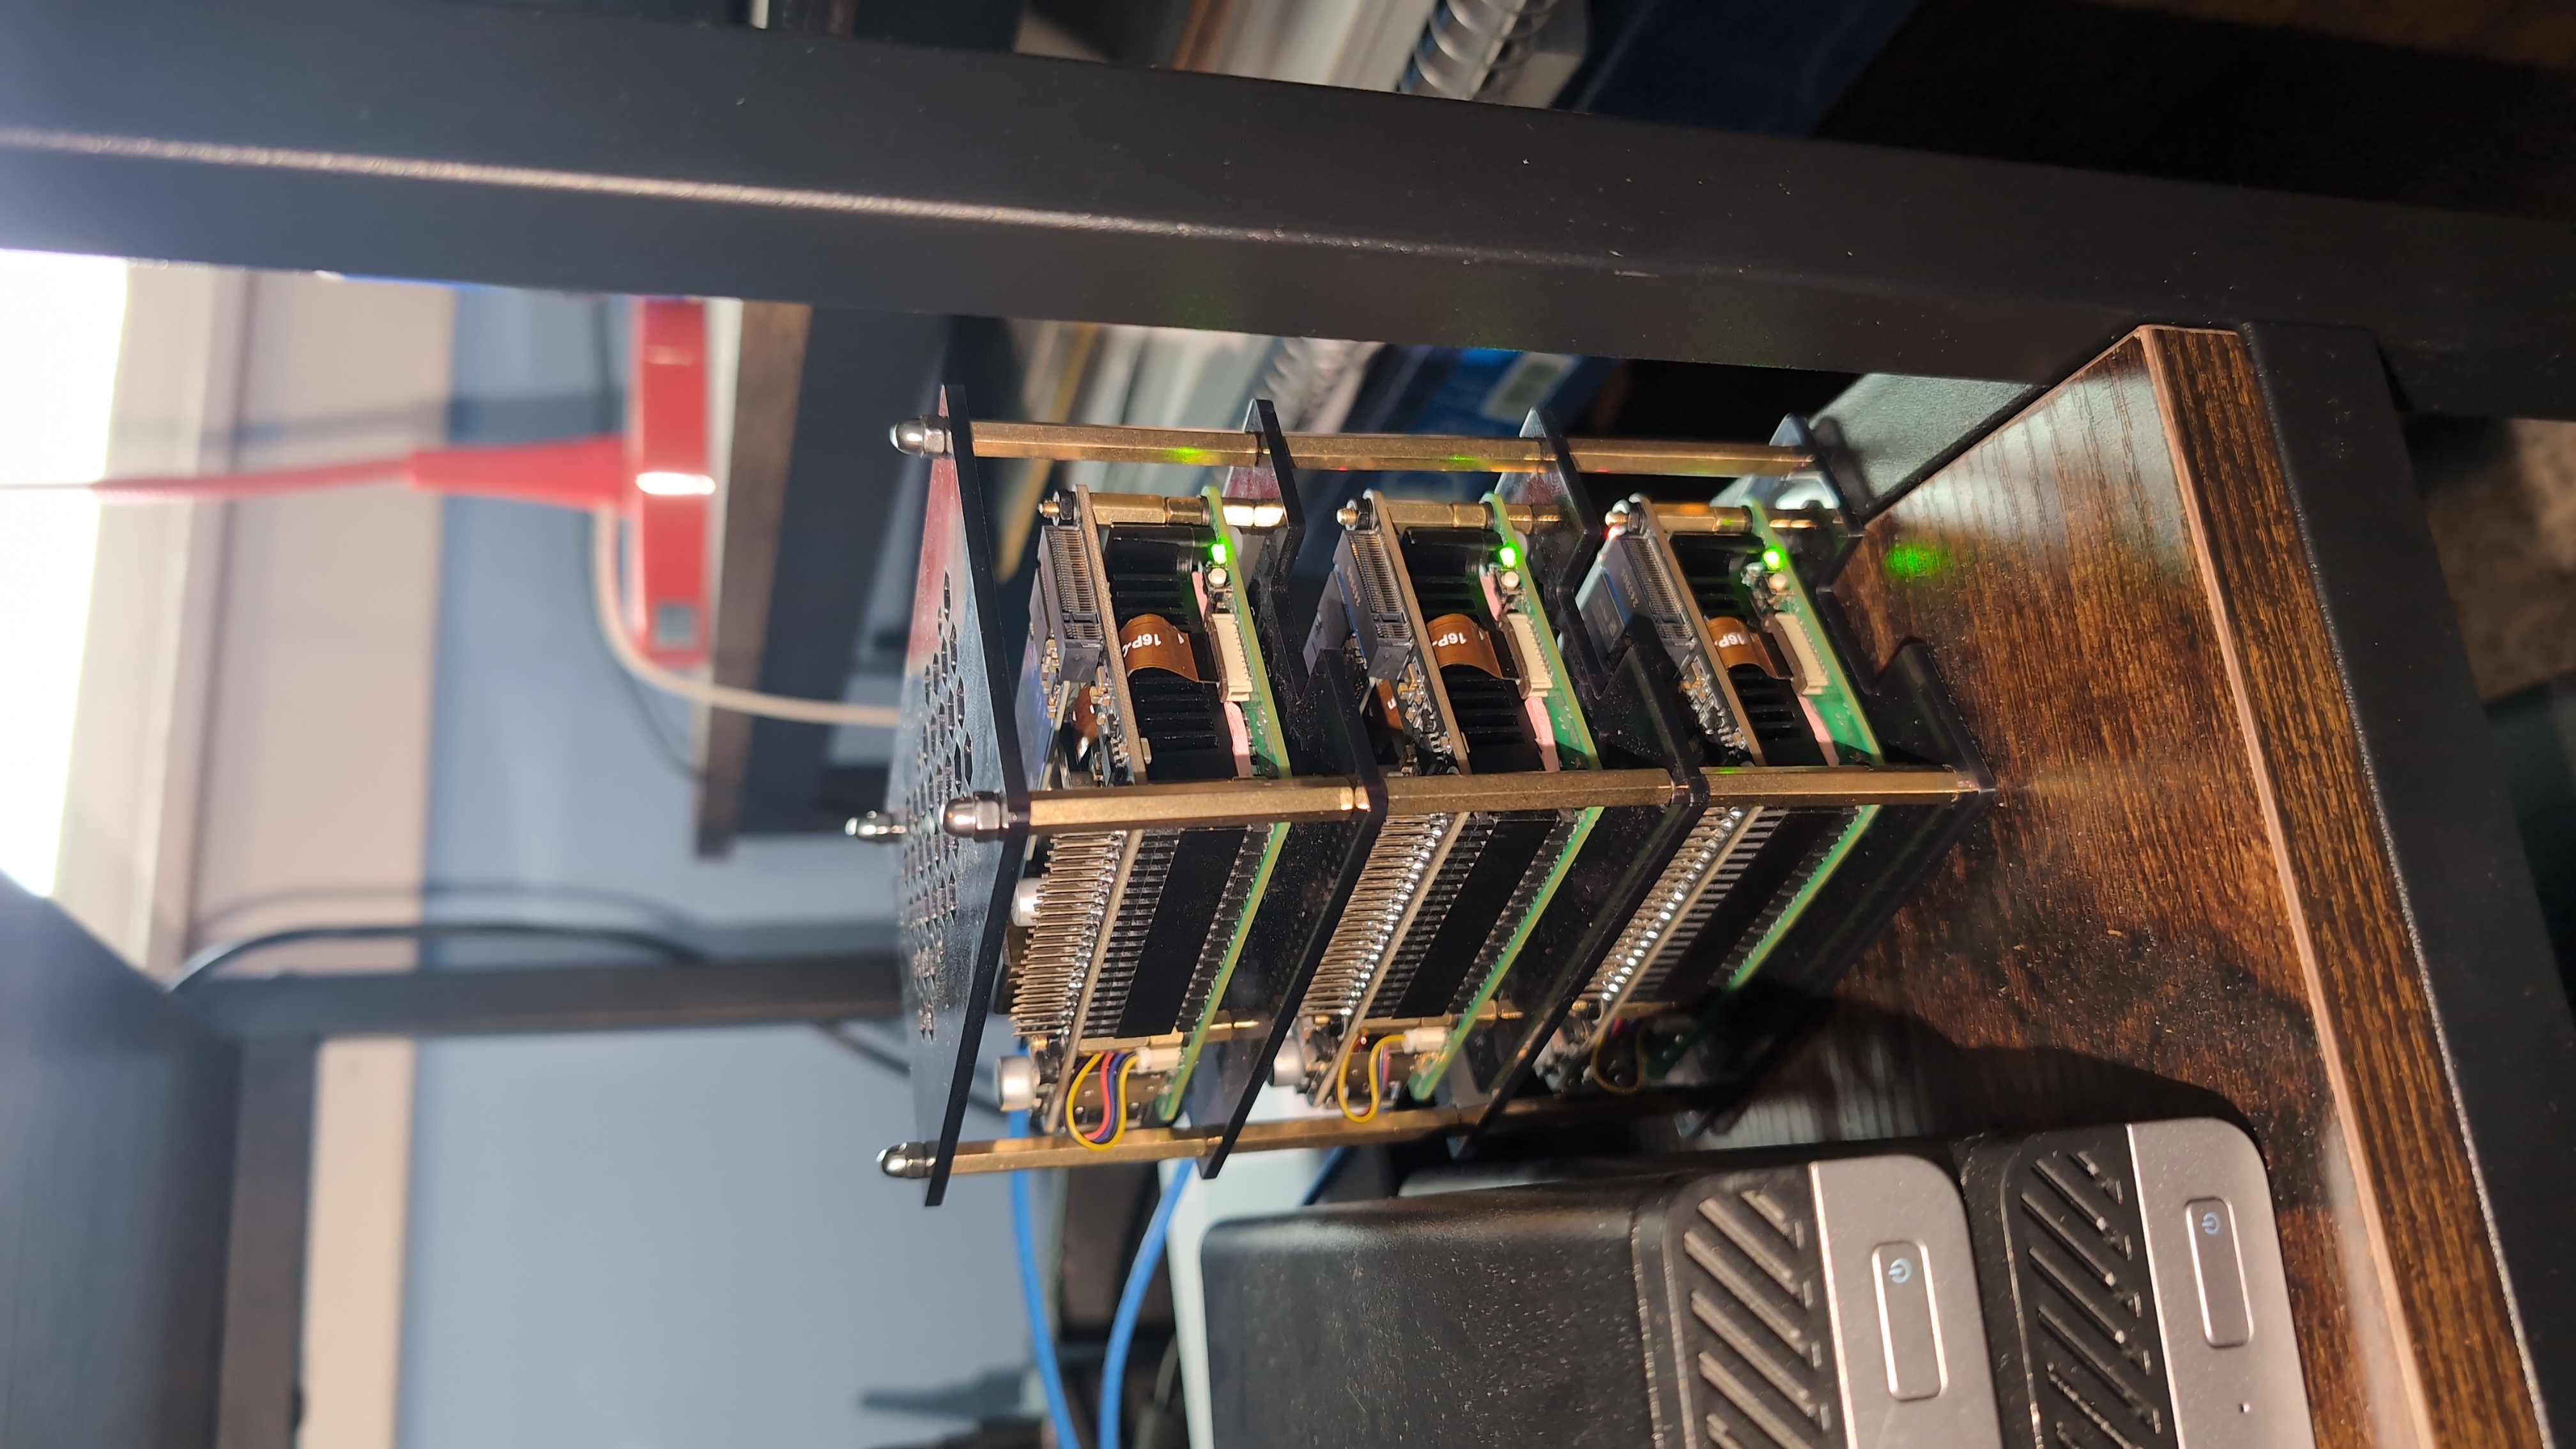 An updated look at my Pi stack. It may look the same… well, because it basically is the same.
My Experience with Raspberry Pi
When I first started building my homelab, I wasn’t sure where to begin. Unfortunately, I didn’t start with Raspberry Pi’s, but they quickly became a top priority after realizing how power-hungry my old gaming PC-turned-server was.
Power consumption became a real concern, so I started looking into alternatives. The challenge was finding something both low-power and cost-effective—a combination that doesn’t always come easy. That’s when Raspberry Pi’s became the obvious choice. By the time I made my purchase, the Pi 5 had already been out for a few months.
What Stood Out
Right away, a few things impressed me about the Raspberry Pi 5:
- Compact size – Small enough to fit just about anywhere.
- Low power consumption – A fraction of what a full PC uses.
- Versatility – The ecosystem of HATs (Hardware Attached on Top) is constantly growing, with support for NVMe storage, PoE, and even AI acceleration.
At launch, accessories were limited, but Waveshare stepped up early with some of the first Pi 5 PoE HATs. I initially used a separate PoE HAT, but later upgraded to a combination HAT that includes both NVMe and PoE for a cleaner setup.
Challenges Along the Way
The Raspberry Pi 5 was my first real deep dive into Linux, and it also meant transitioning from amd64 to arm64. While ARM support is growing, it’s still not as widely supported as traditional x86 systems.
But software wasn’t my only hurdle.
Hardware Issues
When setting up my stack, I ran into an issue where the fans weren’t spinning correctly. Initially, I thought it was a software bug, but after some troubleshooting, I realized it was a clearance issue. The fan was making contact with the PoE/NVMe HAT above it.
The fix was straightforward—I added spacers to create more clearance, and now the fans work as intended. Overheating is no longer a concern, even under load.
Current Use Case: DNS Servers
Originally, I planned to run a Kubernetes cluster on these Pi’s. However, since I’m still getting comfortable with Docker, I decided to start with something simpler.
Right now, my Pi stack is functioning as a distributed DNS system using Pi-hole.
Why Pi-hole?
Around the time I finished setting up my stack, Pi-hole v6 was released, bringing a number of improvements—including a built-in NTP server. I deployed it across all three Pi’s and also integrated Cloudflare’s DoH for encrypted DNS queries over HTTPS.
By default, DNS operates over plaintext, making it vulnerable to interception. DoH (DNS over HTTPS) encrypts these queries, significantly improving security. If you’re interested, Pi-hole has excellent documentation on how to set it up.
Downsides of Running Bare-Metal Pi-hole
One drawback of my current setup is load balancing. Since I’m running Pi-hole on bare metal, there’s no built-in traffic distribution. While devices will naturally spread queries across the three DNS servers, I’d prefer a more efficient balancing mechanism.
This is something that Kubernetes simplifies, as cluster-native load balancers handle distribution seamlessly. I plan to move to K3s (lightweight Kubernetes) once I have more experience with it.
Exploring Other DNS Software
Running my own DNS infrastructure has been an interesting experience, and I’m also looking into Technitium DNS. It’s another open-source DNS server packed with features, though it hasn’t received as much coverage in the homelab community.
I plan to repurpose one of my Raspberry Pi’s to run Technitium DNS and see how it compares to Pi-hole. If I like it, I may consider switching over completely.
I’ve also looked into BIND9, but I tend to prefer GUI-based solutions.
Future Plans for the Pi Stack
The stack isn’t getting any smaller—in fact, it’s only going to grow.
What’s Next:
- Move the stack into a server rack.
- Add more Raspberry Pi’s for redundancy and high availability.
- Transition to a K3s/Kubernetes-based DNS cluster for better load balancing.
- Implement fast shared storage across the stack.
For storage, I plan to mount an NFS share from my NAS, which still has 6.5TB free.
Parts List
Here’s what I’m currently using in my Raspberry Pi stack:
Raspberry Pi’s:
- 3x Raspberry Pi 5 (8GB RAM): https://www.raspberrypi.com/
HATs:
- 3x Waveshare POE M.2 HAT: https://a.co/d/ihWw509
Storage:
- 3x Western Digital 500GB Blue SN550: https://a.co/d/9HWofkN
Case:
- GeeekPi 4 Layer Cluster Case: https://a.co/d/i8j4p15
Misc:
- Male to Female M3 x 40mm Standoffs: https://a.co/d/e7BGt0j
- M2.5 Screws, Nuts & Washers: https://a.co/d/3fxysSG
- Geekworm M2.5 Series: https://a.co/d/3UV8aXA
Networking:
NETGEAR 5-Port Gigbit Unmanaged POE Switch: https://a.co/d/gCrqIzn
Final Thoughts
Building this Raspberry Pi stack has been a rewarding project, and it continues to evolve as I learn more about networking, DNS, and infrastructure management.
If you’re considering a low-power, high-efficiency homelab, Raspberry Pi’s are an excellent starting point. There’s plenty of room to scale, and the community support is fantastic.
Looking ahead, I’ll continue refining this setup, experimenting with Kubernetes, and exploring alternative DNS solutions. There’s always more to learn.